#1,198 – Selectively Enabling Child Elements in a Disabled Panel

When you set IsEnabled to false in a panel, all child elements in that panel are disabled. You cannot selectively enabled child elements in the panel.

You may, however, want to selectively enable child elements in a panel. (E.g. Disable entire panel, then set IsEnabled=True, IsReadOnly=True on TextBox controls so that you can copy text).

One possible solution is to define a new control that inherits from TextBox and does not coerce the value of IsEnabled.

    public class CanEnableTextBox : TextBox
    {
        static CanEnableTextBox()
        {
            CanEnableTextBox.IsEnabledProperty.OverrideMetadata(typeof(CanEnableTextBox),
                new System.Windows.UIPropertyMetadata(true,
                    new PropertyChangedCallback(IsEnabledPropertyChanged),
                    new CoerceValueCallback(CoerceIsEnabled)));

        }

        private static void IsEnabledPropertyChanged(DependencyObject source, DependencyPropertyChangedEventArgs args)
        {
            // Overriding PropertyChanged results in merged metadata, which is what we want--
            // the PropertyChanged logic in UIElement.IsEnabled will still get invoked.
        }

        private static object CoerceIsEnabled(DependencyObject source, object value)
        {
            return value;
        }
    }

You can now use this control in a panel that has IsEnabled set to false and you’ll be able to set IsEnabled on the child TextBox.

#1,176 – Custom Panel, part VIII (Treemap-like Visualization)

Here’s one more example of a custom panel.  The code below is for a panel that arranges its children in a very simple treemap sort of structure.  (This implementation isn’t really a treemap, but vaguely similar to what has been described in the literature).

The panel defines a Weight attached property that the child elements use to indicate a relative weight.  The panel then sorts the children based on weight and arranges them such their final area is proportional to their weight.

    public class ChildAndRect
    {
        public UIElement Element { get; set; }
        public Rect Rectangle { get; set; }
    }

    public class WeightedPanel : Panel
    {
        private static FrameworkPropertyMetadata weightMetadata =
            new FrameworkPropertyMetadata(1.0,
                FrameworkPropertyMetadataOptions.AffectsParentArrange);

        public static readonly DependencyProperty WeightProperty =
            DependencyProperty.RegisterAttached("Weight", typeof(double),
                typeof(WeightedPanel), weightMetadata);

        public static void SetWeight(DependencyObject depObj, double value)
        {
            depObj.SetValue(WeightProperty, value);
        }

        // Measure phase
        protected override Size MeasureOverride(Size availableSize)
        {
            double totalWeight = totalChildWeight();

            foreach (ChildAndRect child in ChildrenTreemapOrder(InternalChildren.Cast<UIElement>(), availableSize))
                child.Element.Measure(child.Rectangle.Size);

            return availableSize;
        }

        // Arrange phase
        protected override Size ArrangeOverride(Size finalSize)
        {
            foreach (ChildAndRect child in ChildrenTreemapOrder(InternalChildren.Cast<UIElement>(), finalSize))
                child.Element.Arrange(child.Rectangle);

            return finalSize;
        }

        private double totalChildWeight()
        {
            double weightSum = 0;
            foreach (UIElement elem in InternalChildren)
                weightSum += (double)elem.GetValue(WeightProperty);

            return weightSum;
        }

        /// <summary>
        /// Return child elements orderd by weight (largest to
        /// smallest), passing back Rect for each child
        /// (size and location), implementing a (crude)
        /// treemap.
        /// </summary>
        /// <param name="elems">Child elements to measure/arrange</param>
        /// <param name="containerSize">Available container size</param>
        /// <returns></returns>
        private IEnumerable<ChildAndRect> ChildrenTreemapOrder(IEnumerable<UIElement> elems, Size containerSize)
        {
            double remainingWeight = totalChildWeight();

            double top = 0.0;
            double left = 0.0;

            // Alternate between left edge and top edge
            bool leftEdge;

            // Sort by weight
            var childrenByWeight = elems.OrderByDescending(
                e => (double)e.GetValue(WeightProperty));

            // Allocate space for each child, one at a time.
            // Moving left to right, top to bottom
            foreach (var child in childrenByWeight)
            {
                leftEdge = (containerSize.Width - left) > (containerSize.Height - top);

                Size size;

                double childWeight = (double)child.GetValue(WeightProperty);
                double pctArea =  childWeight / remainingWeight;
                remainingWeight -= childWeight;

                // Entire height, proportionate width
                if (leftEdge)
                    size = new Size(pctArea * (containerSize.Width - left), containerSize.Height - top);

                // Top edge - Entire width, proportionate height
                else
                    size = new Size(containerSize.Width - left, pctArea * (containerSize.Height - top));

                yield return new ChildAndRect { Element = child, Rectangle = new Rect(new Point(left, top), size) };

                if (leftEdge)
                    left += size.Width;
                else
                    top += size.Height;
            }
        }
    }

Below, we use the panel to create labels representing several states. The Weight property is used to record the states’ area.  (The states are in no particular order).

    <loc:WeightedPanel>
        <Label Content="Oregon" loc:WeightedPanel.Weight="93381"
               Background="Bisque" />
        <Label Content="California" loc:WeightedPanel.Weight="163696"
               Background="Lavender" />
        <Label Content="Colorado" loc:WeightedPanel.Weight="104094"
               Background="LightCoral" />
        <Label Content="Montana" loc:WeightedPanel.Weight="147042"
               Background="Honeydew" />
        <Label Content="Nevada" loc:WeightedPanel.Weight="110561"
               Background="Goldenrod" />
        <Label Content="New Mexico" loc:WeightedPanel.Weight="121589"
               Background="Silver" />
        <Label Content="Texas" loc:WeightedPanel.Weight="268581"
               Background="Thistle" />
        <Label Content="Arizona" loc:WeightedPanel.Weight="113998"
               Background="GhostWhite" />
    </loc:WeightedPanel>

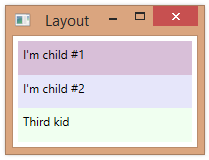
Here’s what this looks like at run-time:
1176-001
Note: One improvement that could be made to this algorithm is to adopt a true implementation of a treemap algorithm that includes “squarifying” elements to reduce the number of “long skinny” child objects.

#1,175 – Custom Panel, part VII (Using Attached Property to Arrange)

Here’s an example of a custom panel that uses an attached property (weight) in determining both size and position of child elements.

    public class WeightedPanel : Panel
    {
        private static FrameworkPropertyMetadata weightMetadata =
            new FrameworkPropertyMetadata(1.0,
                FrameworkPropertyMetadataOptions.AffectsParentArrange);

        public static readonly DependencyProperty WeightProperty =
            DependencyProperty.RegisterAttached("Weight", typeof(double),
                typeof(WeightedPanel), weightMetadata);

        public static void SetWeight(DependencyObject depObj, double value)
        {
            depObj.SetValue(WeightProperty, value);
        }

        protected override Size MeasureOverride(Size availableSize)
        {
            double totalWeight = totalChildWeight();

            foreach (UIElement elem in InternalChildren)
            {
                double childWeight = (double)elem.GetValue(WeightProperty);
                double childHeight = (childWeight / totalWeight) * availableSize.Height;
                elem.Measure(new Size(availableSize.Width, childHeight));
            }

            return availableSize;
        }

        protected override Size ArrangeOverride(Size finalSize)
        {
            double totalWeight = totalChildWeight();
            double top = 0.0;

            foreach (UIElement elem in InternalChildren)
            {
                double childWeight = (double)elem.GetValue(WeightProperty);
                double childHeight = (childWeight / totalWeight) * finalSize.Height;
                Rect r = new Rect(new Point(0.0, top),
                                  new Size(elem.DesiredSize.Width, childHeight));

                elem.Arrange(r);

                top += childHeight;
            }

            return finalSize;
        }

        private double totalChildWeight()
        {
            double weightSum = 0;
            foreach (UIElement elem in InternalChildren)
                weightSum += (double)elem.GetValue(WeightProperty);

            return weightSum;
        }
    }

Below, we use this panel, specifying that 2nd label is 2x bigger (more weight) than the first label.

    <loc:WeightedPanel>
        <Label Content="I'm child #1" loc:WeightedPanel.Weight="1"
               Background="Thistle" />
        <Label Content="I'm child #2" loc:WeightedPanel.Weight="2"
               Background="Lavender" />
        <!-- Weight defaults to 1 -->
        <Label Content="Third kid"
               Background="Honeydew" />
    </loc:WeightedPanel>

1175-001

#1,171 – Custom Panel, part III (Using DesiredSize)

When creating a custom panel and overriding the measure and arrange methods, your custom panel can make use of a child element’s DesiredSize property when deciding what size to make each child and where to arrange them.

The code below arranges child elements vertically, like a vertical StackPanel, stretching each child to fit the panel’s full width, but using each child element’s DesiredSize.Height.

    public class MyPanel : Panel
    {
        protected override Size MeasureOverride(Size availableSize)
        {
            // Tell child they have as much height as they want
            Size childSize = new Size(availableSize.Width, double.PositiveInfinity);

            // Calling Measure causes each child to set its DesiredSize property
            foreach (UIElement elem in InternalChildren)
                elem.Measure(childSize);

            return availableSize;
        }

        protected override Size ArrangeOverride(Size finalSize)
        {
            Size childSize;

            double top = 0.0;
            for (int i = 0; i < InternalChildren.Count; i++)
            {
                // We force each child to full width, but let it
                // be at desired height
                childSize = new Size(finalSize.Width, InternalChildren[i].DesiredSize.Height);
                Rect r = new Rect(new Point(0.0, top), childSize);
                InternalChildren[i].Arrange(r);
                top += childSize.Height;
            }

            return finalSize;
        }
    }

We can use the panel as follows:

    <loc:MyPanel Margin="5" Background="LightGray">
        <Label Content="I'm child #1"
               Background="Thistle" />
        <Label Content="I'm child #2"
               Background="Lavender" />
        <Label Content="Third kid"
               Background="Honeydew" />
    </loc:MyPanel>

The panel at runtime looks like:
1171-001

#1,170 – Custom Panel, part II (Simple Arrangement of Child Elements)

You create a class that derives from Panel in order to create a panel control with custom behavior.  Below, we expand on the earlier example to create a simple panel that stacks its child elements vertically, stretching them to fit the available space.

Here’s what happens:

  • In the Measure phase, we tell each element how big it should be, dividing the vertical space by the # child elements
  • In the Arrange phase, we position the elements
    public class MyPanel : Panel
    {
        protected override Size MeasureOverride(Size availableSize)
        {
            Size childSize = new Size(availableSize.Width, availableSize.Height / InternalChildren.Count);

            foreach (UIElement elem in InternalChildren)
                elem.Measure(childSize);

            return availableSize;
        }

        protected override Size ArrangeOverride(Size finalSize)
        {
            double childHeight = finalSize.Height / InternalChildren.Count;
            Size childSize = new Size(finalSize.Width, childHeight);

            double top = 0.0;
            for (int i = 0; i < InternalChildren.Count; i++)
            {
                Rect r = new Rect(new Point(0.0, top), childSize);
                InternalChildren[i].Arrange(r);
                top += childHeight;
            }

            return finalSize;
        }
    }

1170-001

#1,169 – Custom Panel, part I (Measure and Arrange)

You can create a class that derives from Panel in order to create a panel control with custom behavior.  You typically override the following two methods in your custom panel:

  • MeasureOverride – You call Measure method on each child element to determine how much space they need, then return the total space needed
  • ArrangeOverride – You call Arrange method for each child element to position them

Below is a very simple example–a panel that does nothing in either its MeasureOverride or ArrangeOverride methods.  We’ll build on this class in future posts.

    public class MyPanel : Panel
    {
        protected override Size MeasureOverride(Size availableSize)
        {
            Size measuredSize = base.MeasureOverride(availableSize);
            return measuredSize;
        }

        protected override Size ArrangeOverride(Size finalSize)
        {
            Size arrangedSize = base.ArrangeOverride(finalSize);
            return arrangedSize;
        }
    }

If we add children to this panel, they will not be displayed. Below is debug output at run-time. MeasureOverride returns (0,0) because we haven’t calculated any sizes.
1169-001

#1,000 – Displaying the Contents of a ListBox in a Circle

We can arrange the child elements of a ListBox into a circle by defining a new class that inherits from Panel, as follows:

    public class CircularPanel : Panel
    {
        protected override System.Windows.Size MeasureOverride(System.Windows.Size availableSize)
        {
            foreach (UIElement child in Children)
                child.Measure(new Size(double.PositiveInfinity, double.PositiveInfinity));

            return base.MeasureOverride(availableSize);
        }

        // Arrange stuff in a circle
        protected override System.Windows.Size ArrangeOverride(System.Windows.Size finalSize)
        {
            if (Children.Count > 0)
            {
                // Center & radius of panel
                Point center = new Point(finalSize.Width / 2, finalSize.Height / 2);
                double radius = Math.Min(finalSize.Width, finalSize.Height) / 2.0;
                radius *= 0.8;   // To avoid hitting edges

                // # radians between children
                double angleIncrRadians = 2.0 * Math.PI / Children.Count;

                double angleInRadians = 0.0;

                foreach (UIElement child in Children)
                {
                    Point childPosition = new Point(
                        radius * Math.Cos(angleInRadians) + center.X,
                        radius * Math.Sin(angleInRadians) + center.Y);

                    child.Arrange(new Rect(childPosition, child.DesiredSize));

                    angleInRadians += angleIncrRadians;
                }
            }

            return finalSize;
        }
    }

We can now use this panel as the ItemsPanel for a ListBox.

        <ListBox ItemsSource="{Binding ActorList}">
            <ListBox.ItemsPanel>
                <ItemsPanelTemplate>
                    <local:CircularPanel />
                </ItemsPanelTemplate>
            </ListBox.ItemsPanel>
        </ListBox>

1000-001
1000-002
(Thanks to Jobi Joy for an example of this).

#682 – Panel Elements Only Fire Mouse Events When Background Is Set

If you create an element derived from Panel, like Canvas, and wire up any of the mouse-related events, you’ll notice that you don’t see your events unless you’ve set the Background property of the Panel.  You will, however, see the routed events when a child element of the canvas originates the event.

In the example below, we don’t see MouseMove event on the Canvas unless we’re moving the mouse over one of the child Buttons.

    <Canvas MouseMove="Canvas_MouseMove">
        <Button Content="Preston Sturges" MouseMove="Button_MouseMove"
                Canvas.Left="10" Canvas.Top="10"/>
        <Button Content="John Ford" MouseMove="Button_MouseMove"
                Canvas.Left="10" Canvas.Bottom="10"/>
        <Button Content="Michael Curtiz" MouseMove="Button_MouseMove"
                Canvas.Right="10" Canvas.Top="10"/>
    </Canvas>

If you do want to see mouse events on a Panel, you need to explicitly set its Background property.  If you don’t want a background color, you can just set the property to Transparent.

    <Canvas MouseMove="Canvas_MouseMove" Background="Transparent">

#537 – Changing a Layout Panel to a Different Type

In Blend, you can easily change an existing layout panel to a different type of panel, by interacting with the panel object in the Objects and Timeline panel.

Let’s say that you have a series of Button controls as child elements of a StackPanel.

If you want to use a UniformGrid panel as a container, rather than the StackPanel, you can right-click on the StackPanel object in the Objects and Timeline panel and select Change Layout Type.  Then select the desired type of panel that you’d like to use.

Once you select the new layout panel type, the XAML will be updated to replace the old panel with the new one.  Both the artboard and the Objects and Timeline panel will also immediately update to reflect the new panel.

#387 – Set Background Color to See How Layout Works

It’s sometimes hard to understand how a container is laying out its children.  You can use the Background property of each control, or of the panels, to get a better idea of where things are.

Suppose that we have a GUI that includes a handful of controls and two nested panels.

    <StackPanel Orientation="Vertical">
        <Label Content="Bob's Your Uncle" HorizontalAlignment="Right"/>
        <StackPanel Orientation="Horizontal">
            <Label Content="Paul"/>
            <Button Content="Ringo" Margin="10"/>
            <TextBox Text="George" VerticalContentAlignment="Bottom"/>
        </StackPanel>
        <TextBox Text="Herman was here.."/>
    </StackPanel>

The GUI would look like this:

To better see how things are being layed out, we can set the Background to a different color for each element.

    <StackPanel Orientation="Vertical" Background="Pink">

        <Label Content="Bob's Your Uncle" HorizontalAlignment="Right" Background="Lavender"/>

        <StackPanel Orientation="Horizontal" Background="LightBlue">
            <Label Content="Paul" Background="Red"/>
            <Button Content="Ringo" Margin="10" Background="Green"/>
            <TextBox Text="George" VerticalContentAlignment="Bottom" Background="Blue"/>
        </StackPanel>

        <TextBox Text="Herman was here.." Background="Orange"/>
    </StackPanel>